- eCommerce Settings
- Localization
- Import/Export
- API Documentation
- Customizing Your Job Board
- Integrations
- BLOG ARTICLES
- Change Log
- Understanding the HiringOpps Platform
- - Back-Office Admin
- General
Recent Posts
Most Popular


Customizing Headers, Sidebars and Footers

Customizing Headers and Footers for your Site
To customize the navigation options offered to visitors you can customize the Header menu. This menu varies depending on the type of user and can be customized for each user type as well.
- Login to your back-office admin.
- Expand the Content Management section and click Menus.
- Find the type of user you would like to change the menus for
- Click on Header, Sidebar, or Footer next to the user.
- Menus can be customized on a per network or per site basis
- Networks with only one site should customize at the Network Level as a general rule. These customizations will be carried over to any extra sites that are created.
You can remove existing menu items by clicking on the red Hide button next to the item you wish to hide. Hiding a parent item will hide all items nested below it as well. Hiding added menu items is done by clicking Edit and then checking the checkbox marked "Hide."
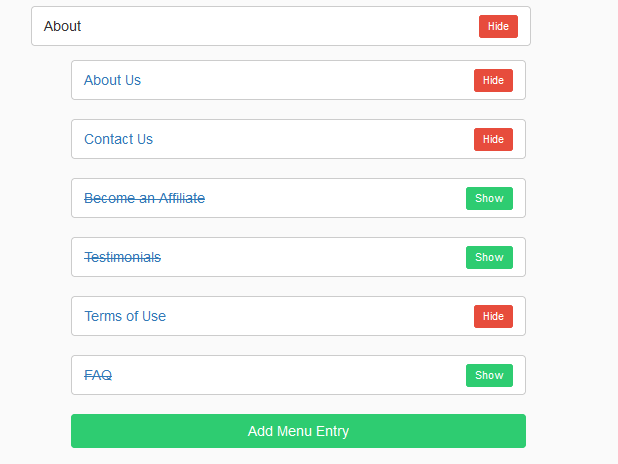
Adding a New Menu Item
To add a new header menu item for a user type, click on the Header, Sidebar, or Footer button for the user type you would like to customize. Click on the Add Menu Entry button to add the menu item in the desired place. The following items need to be filled out on the next screen:

Parent, Role and Type are set from the selection and are displayed for informational purposes only.
- Title - this is the text that will display for the user
- Icon - Navigate to fontawesome.com/icons to set an icon for the menu item.
- The format will be fa-{icon name}, e.g. fa-circle
- This is not required but may be a good visual indicator for users. Some menu types do not allow menu icons
- The format will be fa-{icon name}, e.g. fa-circle
- URL - The page that the item will link to.
- For pages on the network, this can be the slug.
- For external pages, make sure to copy the whole URL
- Position - Order of the items. Items will be displayed in the following order:
- Negative items first (left or top), with -1 the most left and then larger numbers in order after
- Default Items
- Positive items in numerical order
- Class - Sets the class for the menu item, can usually be left blank unless this is needed for customization
- Style - Sets the style for the menu item, CSS style code placed here will apply to the menu item. Leave this blank to keep standard formatting
Community Footer
The community footer menu is edited under the site settings, accessible from the Admin Page.Click on Sites to bring up the Sites page.- Find the site you wish to edit and click Actions on the right side of the screen, then "Edit Site"
- Find the "Social Networks" Section and enter the URL for your Social Network pages you wish to appear in the footer menu
- Any fields left blank will not appear in the footer menu


Comments